Happy Sunday, everyone!
So last week Taylor, his dad, and his brother all went skiing
so Mama Hawkins and I decided to have a craft day!
While we were trying to decide what to do
(scrapbooking, card making, pottery...the options are endless!)
Jody mentioned that she had leftover fabric for the blankets she
makes for a local child shelter, so I was delighted to make a blanket for my future munchkin.
It was really simple, so I have decided to show you all
how to make it!
(1) Here are the supplies needed: 45x60 sized of a top fabric, back fabric and whatever thickness of batting you'd prefer (I went with the thinner choice), scissors, measuring tape, ruler of some type (I used a clear 6x12 ruler as you can see here) to measure out your squares to make triangles with, an iron, sewing machine with thread, and pins.
(2) First thing you want to do is cut out 4x4 inch squares of the fabric you are using for your triangles. You will need about 75. If you do end up needing more, simply cut and make more triangles and add them to the end of the chain (see below).
(3) Next, fold your square into a triangle, lining up all the sides correctly.
(4) Fold the triangle you just made one more time, lining up the corners as best as possible so that you have a miniature triangle.
(5) Next, take your iron and iron the entire triangle on medium heat, with no steam.
(6) It will look like this when you're finished and should stay folded down easily.
(7) This should be about half the size of the pile of triangles.
(8) Once you have all your triangles done, you will take one triangle, with the side that can open up facing to the right (folded side facing to the left) and slip another triangle in that part, with the open side also facing to the right. Sew those two triangles together keeping the foot of the sewing machine in line with the edge of the triangles, as shown. Leave a good portion of the triangle not sewn so that you can slip another triangle in and continue sewing a long line of triangles to make the border of the blanket.
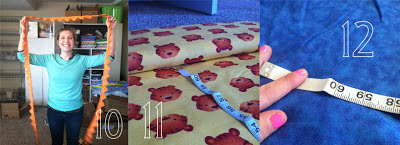
(9)& (10) Continue sewing all the triangles together as described above until you have a long chain, all sewn together. If you think you will need to add more triangles, do not sew the last triangle all the way so you can add more to it later.
(11) & (12) Set your triangles aside, and measure out 60" of the two fabrics you will be using as the back and front of your blanket.
(13) Next, line up the string of triangles with the fabric you will be using as the front of your blanket and pin them (lots of pins!) along the border of the fabric.
(14) When you get to the corners of your fabric, you will be "rounding" the triangles around them so that the triangles will be evenly spread around the entire blanket. After you've finished pinning all the triangles around the front piece of fabric, simply sew the triangles on, sewing on the same line as you did the triangles (line the edge of the fabric with the edge of the foot of the sewing machine).
(15) After you've sewn the triangles onto the front piece of fabric, place the triangles inside, and lay the front fabric and the back fabric right sides together, placing the batting on top.
(16) & (17) After you have aligned everything up properly so all sides meet up, this is what you should have in front of you. Pin (a lot!) all the way around the entire blanket.
(18) Sew all the way around the blanket, making sure to not start anywhere near a corner and sewing on top of the previous stitched you've already made. Try not to sew outside the stitch already made, but if you do go off the original stitch, make sure it's INSIDE, that way it won't be seen on the finished product. Leave a large pocket for you to pull the blanket back through right side out.
(19) Snip/trim the excess fabric after you're finished sewing to prevent bunching of corners.
(20) VOILA! Your blanket is done! All you need to do is hand stitch up the hole you left to pull your blanket through and you've got a beautiful new baby blanket! I am going to be tying my blanket still, but you don't have to. If you do want to tie it and aren't sure how, leave me a comment
and I'll post a DIY how-to for that also!
Thanks for stopping by!
If you have any questions, concerns, comments,
please feel free to let me know, I'd love to hear from you!
{A&T}


No comments:
Post a Comment